Here is another FUN-tastic Autumn DIY that would make a stunning center piece. It comes from Madigan Made's blog so check her out for more!
Question: What do you do when you are
Answer: Find a repetitive, mindless task that does not require power. (You know, in case the power goes out. Fortunately, it didn't for us.) And if you are crafty (or not!) that tedious activity might be to create one of these studded pumpkins.
Yep... the gold thumbtack train continues here on Madigan Made!!
(BTW- The runner up title for this post was "Thumbtackular!" thanks to Chelsea from two twenty one and her suggestion last night on Twitter.)
Sunday I showed you my brass tack covered wreath.
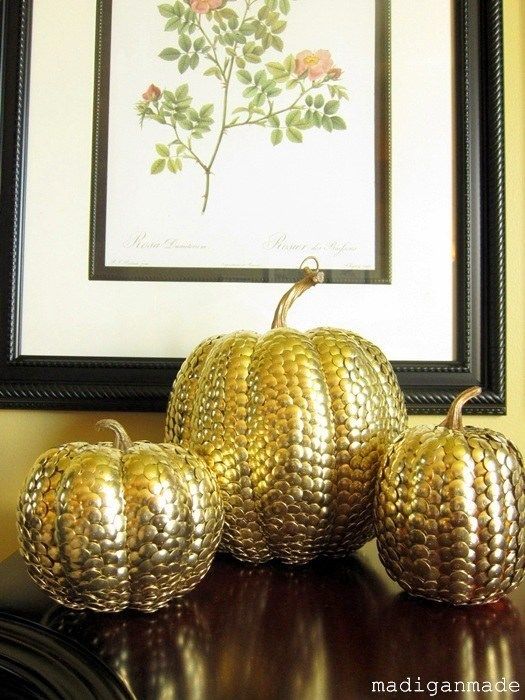
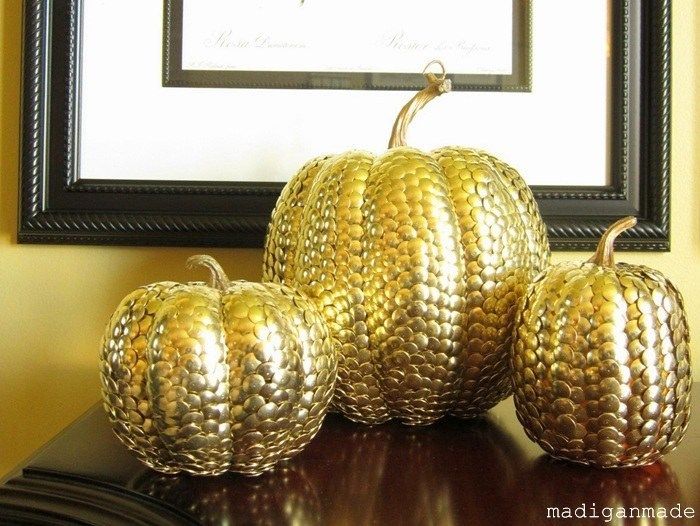
Now I want to show you my gilded pumpkins!
I actually made these beauties before I made the thumbtack wreath, but I wanted to show you the wreath first to coincide with the Nester's wreath party.
Like the wreath, I was inspired to make these metallic gourds after I made my thumbtack covered globe. The thumbtack texture was so neat, I wanted to try it on other things.
AND, if you follow me on Pinterest, especially my Fall inspiration board, you would see that I've also been enamored with the idea of gilded and gold leaf pumpkins lately.
I love sparkle and shine around Christmas... and I'm slowly appreciating a little glam for autumn, too. I could have made these silver, I suppose. But lately, I'm learning to love brass.
Gold hues can add warmth in the cooler months, don't you think?
Anyhoo, back to the pumpkins... To create them I used a couple of fake foam pumpkins from the craft store. The largest pumpkin was about 6" across. I spray painted them a gold color first in case any of the tacks did not fully cover an area.
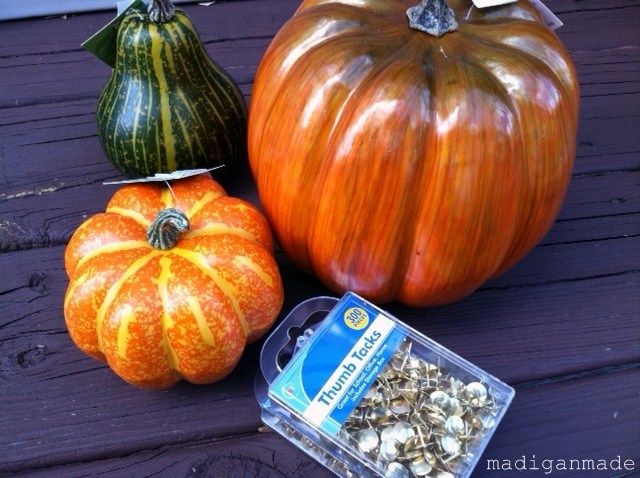
(Note: I did not use the green gourd pictured here... but I went and grabbed a pumpkin from the dollar store instead... while I was buying more tacks. That third pumpkin did not get a coat of gold paint and I regret that fact, because you can kind of see the orange peeking through.)
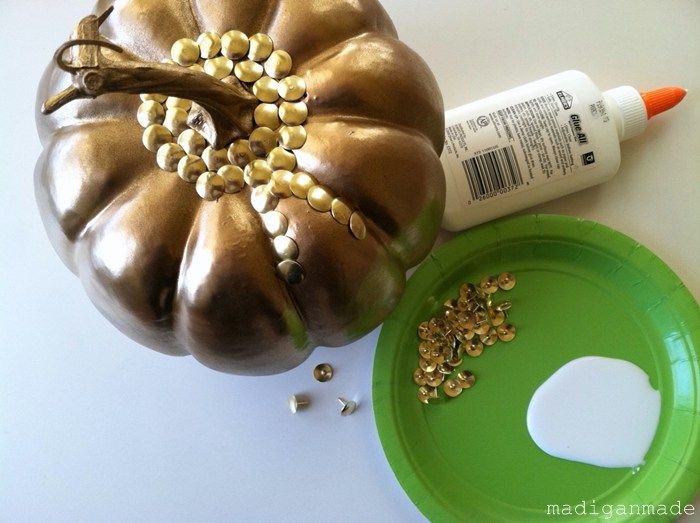
Then, I proceeded to dip the ends of each tack in white glue and press them into the foam shapes. I used glue because I was worried that the tacks would fall out. I stopped using the glue about half way through the large pumpkin because
For placement, I first circled the top and the stem with brass tacks, overlapping as I went. Then I worked my way down the each 'rib' section of the pumpkin. I outlined each of those sections with tacks and then filled in with overlapping tacks. There really was not much of a science to my method. I overlapped the tacks and where I saw 'holes', I just added another one!
I had quite a few comments from you all about how many tacks I used on the brass tack wreath! ;)
Well, I used a TON more tacks with these three shapes! Good thing I
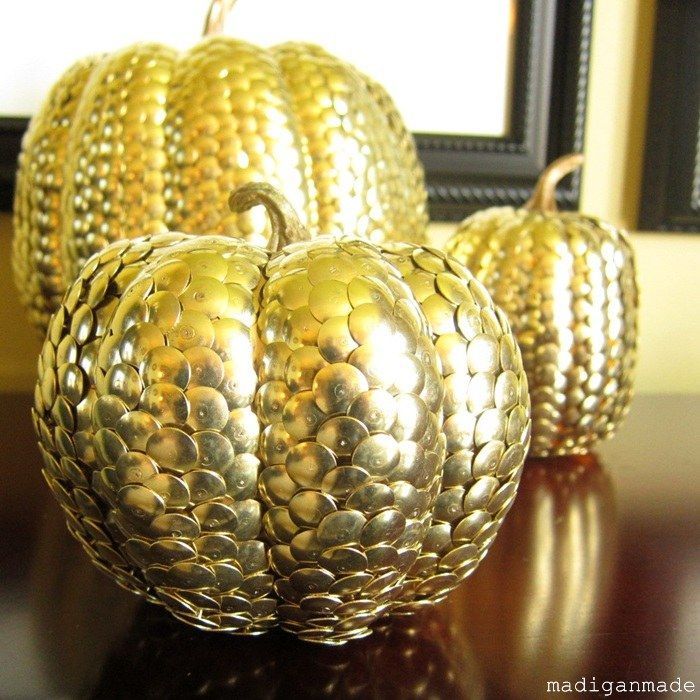
With the large pumpkin, I lost count after 6 boxes of tacks. I'd guess that I used about 7 for that one. So, there are at least 1800-2100 tacks on that pumpkin alone! The smaller pumpkins took about 2-3 boxes of tacks.
Considering it was a dollar for a box of tacks plus $5 or less for a pumpkin form - it really did not cost that much to make these gilded pumpkins. It just cost me loads of time! ;)
No comments:
Post a Comment